Thursday, April 19, 2012

Ladies and Gentlemen, Prime Your Wicks! How To Use Unprimed Wick

LX 12 Wicks Cut For Votives
Wick Soaking In Melted Wax


Candle makers, you have probably noticed the savings in buying unprimed, spooled wick versus purchasing the primed and tabbed variety. Wicks are expensive! In this post, I will show you how to prime your wick for candle making. Primed wick is much easier to work with, because it is coated with a stiff wax to keep the wick upright while pouring your candle.

Materials:
-umprimed wick
-high melt point wax (140 MP or higher)
-wick tabs
Step 1)
Melt the wax for the outer coating using a melting pot or a double boiler, never on direct heat.

Step 2)
Cut the wick into 2 or 3 foot sections and add it to the melted wax. Stir it up and make sure the wick is fully submerged.

Step 3)
Using a tongs or skewer, remove the wick, one strand at a time from the vat of hot wax. Be careful about drips and burns.


Step 4)
Working quickly, straighten the length of wick and let it dry on a piece of tin foil. You will have about 2 minutes to work before it fully hardens.

Step 5)
Trim wick to desired length and assemble the wick base.

Happy candle making! One note about the procedure is that I have decided it is far more economical to buy wicks that are primed and assembled. The cost savings in buying the unprimed wick is overshadowed by the time it takes to prime and assemble the wicks. Some wicks types are only available unprimed, such as the Crafty Candles brand at Hobby Lobby and other specialty wicks.


Removing The Wick
  
The Wick Is Dried and Straight

Assembling The Wick Base


Quick Crafts: Felt Cat Toys With Catnip


Hey, Blue Eyes, Whatcha Got?
During one of my recent blog posts, I discussed a fun class I attended about using craft felt. My project was supposed to be a cup cozy, until demon face got a hold of it. At that point, I surrendered. It had now become HIS toy, not mine.

Since he is so cute, I promptly forgave him for biting up my project, but I had some extra craft felt of my own and I found some catnip at Walmart in their new dollar section. This got me thinking about making my own kitty toys. I bought the catnip and headed home on the bus to see what I could do.

(Disclaimer: I despise Walmart and hate shopping there, please look on Etsy for organic catnip or grow your own).
This Is Some Good Exercise!

While at the craft class, I learned to sew with embroidery thread. Although my novice stitches looked comical, they held up and were sturdy. Unfortunately, I didn't have any thread, thus, sewing my project was not an option. I decided to simply put the catnip inside the craft felt and roll it up, like a jelly roll. When I go to the end, I applied some E6000 craft adhesive and tied the ends shut with wide strips of cotton.

After a letting it dry for 2 days, I tested it out. Pepper declares that this is a good toy! He likes the catnip and the toy is really holding up through some rough play. The E6000 is not coming loose, and no catnip has spilled out.

So, if you have some felt, why not create some toys for your furry friends? You could decorate them with bells, fur, or feathers. I think I am going to make kitty a tiny Christmas stocking next holiday season!

Wednesday, April 11, 2012

Friends, Fun, and Felt: A Night Of Creating at The Art Barn


Chattin' and Craftin'
What can you really get for 15.00 dollars these days? Not much, but at The Art Barn in Rockvale, you can attend an informal arts and crafts class that includes materials. Some classes, like encaustics and silk-screening are more pricey, due to the supplies, but whatever the topic is, it is money well spent for an enjoyable evening of socializing and learning. The classes are for all skill levels. Additionally, there are classes offered for children only.
Buttons And Beads and Thread, Oh My!

So, what did we do at the felt lesson? For me this was great fun, as my mother had shown me how to sew on a button simple stitches, but I quickly forgot. Sorry mom! During the felt lesson, we used acrylic  craft felt to make our choice of project. There were bracelets, ornaments, coffee-cozies and more. I sewed, glued, embellished, drank coffee and asked for glitter; there HAS to be glitter!

Overall, this was a highly enjoyable evening with great conversation. The hostess and owner, Donna, couldn't have been more hospitable. From beginner to advanced, a great time was had by all. See the website here for The Art Barn for the schedule of activities and information. Also, you can request a class in your area of interest. http://theartbarntn.com/Home_Page.html


Folk-Art Flower


Vintage Buttons

Monday, April 9, 2012

Product Review: Zip Dry Paper Adhesive

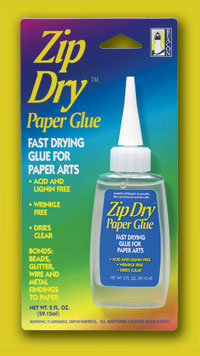
Crafters are always on the lookout for the right glue to do the job and I recently heard of a new product, Zip Dry Paper Glue. It was voted the number one best new crafting product by a major paper arts magazine last year. In fact, here are some of the claims about the products from the Dreamtime Creations website, where it can also be purchased for 5.95:
http://www.dreamtimecreations.com/content/product/large/cgzip.jpg

ZIP DRY PAPER GLUE
SCRAPBOOKING NEVER HAD IT THIS GOOD!
• Fast drying for fast results on almost all paper types.
• Never wrinkles paper, ever! Dries crystal clear.
• Mistake-proof; easily removable when wet without leaving any residue.
• Bonds metal stampings, beads, glitter, wire, and other embellishments to paper.
• Acid and lignin-free: archival quality.
• Special precision applicator tip for accuracy.

Needless to say, I had to try this product. So, how did it live up to the hype? How would I describe this glue in one word? Outstanding!

The glue was fast-drying, crystal clear, left no marks or wrinkles on my cards, and bonded fabric, ribbons, buttons, and paper. I highly recommend this glue and will be using no other glue on my paper projects, unless they come out with a version that has a better applicator. The one problem I had with this adhesive, was that it quickly dried out and clogged the applicator tip, requiring frequent cleaning during projects and the necessity to unclog the nozzle tip with a needle or other thin object. Also, it is not recommended to store the glue with the applicator tip on.

Otherwise, this glue was a fantastic buy and I will purchase it again. I found it for sale locally at Hobby Lobby in Murfreesboro, TN. Be aware that it is in the scrapbook section and not with the regular adhesives. It was around 6.00 dollars as well.

Friday, April 6, 2012

What Can I Do With This? Yard Sale Finds From The 'Boro

Painting with Necklace
Who else likes yard sales and thrift stores? I love them because I can always find unusual objects to use in my arts and crafts. Today, I found a sunflower painting on canvas and a vintage amber colored necklace with a huge focal bead. I also got a paisley cotton sheet at Goodwill on Memorial in Murfreesboro, TN. Total cost of these materials = 5.50 dollars!

The sheet was 1.00 dollar and I harvested almost 3 yards of pure cotton fabric. The painting, which needs a little love and care to clean it up was 3.00 at a yard sale. Also found at the same yard sale was the necklace for 1.00 dollar. Now that is a lot of fun materials to work with for a small price. The big question that remains is, what am I going to do with it? I think I am going to clean up the painting and embellish it with metallic ink and rubber stamps, disassemble the necklace and salvage the beads, and turn the fabric into fabric ribbons. In the last picture, you can see some mixed media cards with metallic die cuts and the paisley fabric. I harvested a lot of fabric from the sheet, so I have plenty left to do more with, yay!
Before cutting the sheet with a rotary cutter, I put it through the washer and dryer twice to make it appear a little more worn and shabby. 
Close Up Necklace


Spot On Painting


Mixed Media Using Paisley Cotton Sheets From Goodwill