Tuesday, February 28, 2012

Tutorial: How to Make Resin Photo and Mixed Media Pendants

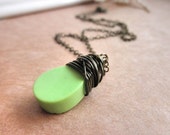
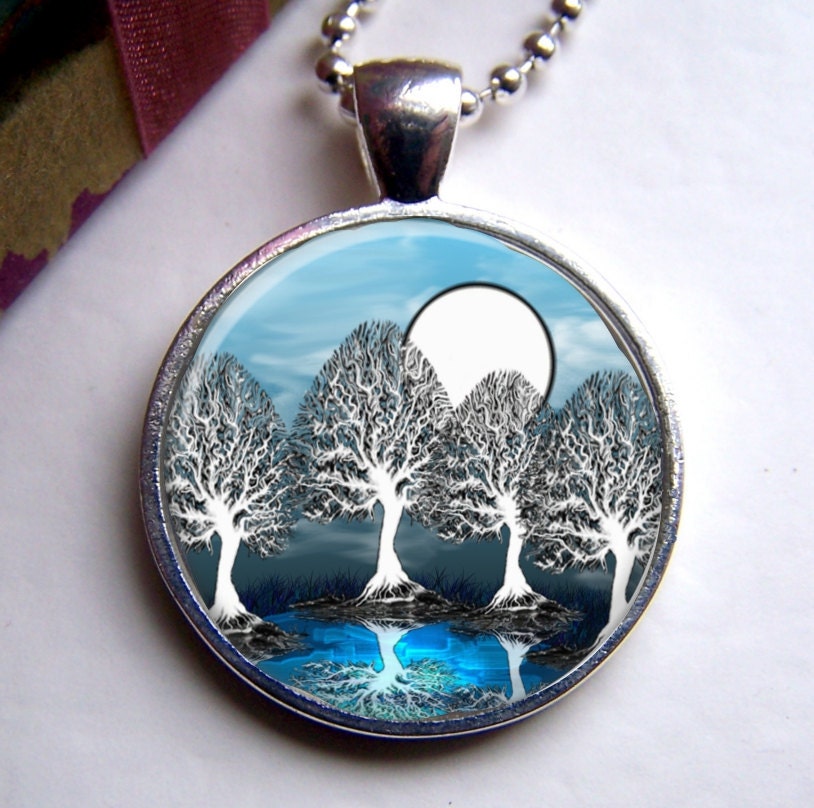
My mixed media pendants- freshly filled with resin


Anyone who has a lot of interesting paper, small objects, paintings, or other doodads has probably wondered how to turn these scraps into wearable art. Creating your own resin pendants is easy; however the start up cost and investment is a lot more than one would pay for a piece made by a jewelry artist. A great idea would be to split the cost of materials and have a pendant making party with a few friends. Now, I am going to walk you through the materials and procedure of making your own assemblage pendants.
MATERIALS:
-2 part epoxy casting resin
-empty bezel cups/pendant trays/settings
-scissors
-jewelry adhesive
-craft sticks
-pencil
-paper, photographs, and objects to embed
-glitter nail polish
-2 disposable containers, such as small plastic cups
-cleaning rag for glue and spills clean up

WHERE TO PURCHASE MATERIALS:

Since I don't have a car, I bought everything I needed online at either etsy.com or ebay. You can also buy the resin and bezel cups at Hobby Lobby and other large craft stores. They are considerably more expensive there. I purchased the supplies in Jan. 2012 and paid about 25 dollars for 20 bezel trays and 20 dollars (plus shipping) for the resin. I also needed to purchase chains for the pendants separately, along with paper and decorations for my jewelry.

HOW TO MAKE THE PENDANTS:
Select background paper and trace an outline with a pencil. Trim the paper a little smaller than your outline, so that it fits in the empty bezel cup.


Using a craft stick, apply a small dollop of jewelry adhesive to the back of your background paper and press it into the setting. If you do not glue it down, the background can float up when you add the resin. Use a fast-drying adhesive with little water content. Trapped water under the resin can cause rust to form in your pendant.

Select decorations for your pendant and secure inside with the adhesive. Use nail polish for glitter effect. You can also use seed beads, small stones. dried flowers, twigs, photographs, and text from vintage books. The sky is the limit to using small objects to decorate your pendant.
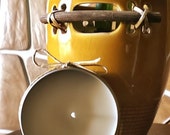
Allow the decorations in your empty settings to dry for at least an hour before proceeding with the resin.


MIXING THE RESIN:
Two part epoxy resins have both a clear resin component and a hardener. They are in separate bottles. You will want to mix your resin in disposable cups, 2-4 oz in size that are flexible for pouring. Mix equal parts of A and B components and stir with a craft stick for two minutes. Then, pour the mixture into a second clean cup and mix for an additional two minutes. You can pour the resin in the settings from that cup. If you have questions, the resin has detailed instructions included. It takes up to 2-3 days to fully harden and cure.

The box of resin used to make my pendants. Bought online at etsy.com.


Resin, hardener, mixing cups.


Mix the resin twice for 2 minutes, then fill pendant trays.


The pendants I made are displayed at the top of the article. They require 2-3 days to harden completely. In the first hour after pouring, monitor the pendants every 15 minutes and poke out any large bubbles with a pin. When the pendants are hard, find a matching chain, add some extra decorative beads and you are ready to sell it, gift it, or wear it!


Please see my etsy shop Mylana to purchase these pendants, and others. They will be ready for sale during the first week of March, 2012.


Sunday, February 26, 2012

Make Your Own Handforged Earwires: Step-By-Step With Pictures


Hand forged Copper Earwires


Hand forged Copper Earwires


Hand forged Silver-Plated Earwires


Hand forged Aluminum Earwires
Ever wanted to make your own handforged earwires for your jewelry? It takes some basic tools and about 10 minutes, but crafting your own earwires adds an artisan flair to your earrings and allows you to make jewelry even if you are out of findings. No more emergency runs to the craft store; invest in the basics and start practicing today. With the same tools, you can move on to clasps and eye-pins too. Plus, it is not difficult. I just got my hammer and bench block this week and I made the following items. Keep your eye on my online store, Mylana, for new and interesting handcrafted earrings.


In this tutorial, I will show you, with the assistance of many pictures, how to begin crafting your own earwires. You can use any type of wire you wish, except enameled wire- the color will chip off the exterior. Keep in mind that some people have allergies to some of the more inexpensive types of wire, like nickle, but pure precious metals can be very expensive! If you decide to use real sterling silver, vermeil, gold, or gold-filled, make sure to practice on cheaper metals first.


GETTING STARTED:
You will need basic jewelry making tools and intermediate level skills. This tutorial assumes you are proficient at cutting wire, making loops, and assembling the finished earrings.


TOOL AND MATERIALS:
-bench block or anvil (available at any jewelry supply or craft store)
-ball peen hammer
-20 gauge wire, half-hard, thinner wire will be more fragile
-side wire cutters
-round nose pliers
-flat nose pliers
-metal file
-rubber earring stoppers for finished earrings (optional)


4 x 4 Steel Bench Block and Hammer
If you are having problems finding a bench block locally, check online. Retailers such as Fire Mountain Gems and bead supply sites should have them. You can also check ebay or Etsy.com for a used one. I got lucky and got this one used for six dollars! They are abut 25.00 new at Hobby Lobby.


Scroll down to see all of the pictures of creating the earwires, then  try it yourself!


Tools


20 ga Copper Wire


Cut 2 sections of wire 3 inches long


Bend the 2 wires around a Sharpie or other object that is about 1/2 inch in diameter


Form the wires into two 1 inch long figure 8 shapes


Cut the wires so you have 2 horseshoe shapes


Form a loop at one end of each wire that wraps around 1.5 times


Lay earwire on bench block and lightly pound with ball peen hammer on each side. You can use either end or a different type of hammer if you wish to texturize the metal. The harder you hammer, the flatter your wire will become, making the earwires wider. Try to achieve a balance between strenght to hold the form of the wire and size of the earwires- to thick earwires will be painful and ones not pounded enough will bend. Experiment!


Pound the second wire flat, using your fingers to bend it and keep it as similar to the first one as possible


Snip the earwires at the ends, so they are even, using the wire cutters.


Use a metal file to smooth the ends and make sure they are not sharp. You are now done and ready to make earrings!


Sunday, February 19, 2012

Make Your Own Gift Boxes: Tutorial


Handmade Paper Gift Box


For some time now, I have wanted to learn to make my own boxes for jewelry or samples. Finally, after much experimentation and searching, I have found an easy way to make a decorative gift box. There are alternate methods, like oragami, if you have the skills. Using the materials and methods below, I was able to learn to make my decorative boxes fairly easily. I would like to first give credit to Mirkwood Designs, where I obtained the template. They have templates for many more projects on this site: http://www.ruthannzaroff.com/mirkwooddesigns/templates.htm


Bottom of Box
MATERIALS:
cardstock
glue
scissors
template
printer


1) Print your template on the back of pre-printed cardstock (the blank side) or on plain paper for you to decorate. I printed the templates with my printer and then selected backgrounds from the printmaster program for the reverse side.

2) Cut out the template, saving the trimmings for gift tags and mini-cards. This is the time that you would use rubber stamps, glitter, and embellishments to decorate your box.


Earrings In Box
3) Fold template along dashed lines and make cuts where the lines are solid. If you are into serious paper crafting, you might be interested in a "bone folder", a tool to make folding paper easier.

4) Assemble the box top and bottom, adding paste to the tabs.

5) Allow the paste to dry for about one hour. You can then use your box!


Box Template


Decorative Paper and Supplies


Wednesday, February 15, 2012

How To Make Soy Tea Light Candles: Tutorial

Handmade Soy Tea Light Candles
In this article, I will walk you through the steps of making soy wax tea light candles in clear, polycarbonate cups. This is an intermediate level candle making project, because you will need to make a few test batches to determine a good match for the size and type of wick to use. Some suppliers sell kits with everything you need to get started. In that case, making tea lights is an easy way to being making soy candles. I prefer the polycarbonate cups to metal cups because they are sturdier and do not bend, warp, or dent easily; however you can use metal cups with these directions as well.

MATERIALS:
China Rain Tea Lights
soy wax
wicks
polycarbonate cups
color
scent
packaging

EQUIPMENT:

wax melter/double boiler/ microwave
small pouring pot
utensil for stirring wax
waxed paper or tin foil for lining work area
thermometer
scale
cleaning rags
scissors


STEP ONE: PREP YOUR WORK AREA
Lay down waxed paper or tin foil over the surfaces you will be using to protect from wax spills and gather your equipment.
Candle Scent and Dye

STEP TWO: MELT YOUR WAX
I use a presto pot melter with a spigot. You can buy these online at Etsy.com or other candle suppliers. Set the temperature to just under 200. Other options include double boiler or microwave. Only use the microwave for pure soy wax and do not leave it unattended. Zap the wax for two minute increments, stir, and put it back in for two more minutes, until the wax is melted.

STEP THREE: LAY OUT CUPS AND WICKS WHILE THE WAX IS MELTING:
Organize your cups and wicks into neat and orderly rows while the wax melts. Get your wicks ready by straightening each one and having them close to your cups for easy access. Once you pour the wax, you will need to move fast. For wick size, I like LX 12 tabbed wicks for soy wax best. In the picture, I am using zinc core tealight/votive wicks. You will need to make several small batches to test before making a large amount. The wick cannot be too big, or your flame will warp the plastic cup and your tea lights will burn too fast.

Cups and Wicks Ready For Wax
STEP FOUR: COLOR AND SCENT YOUR WAX
Most soy waxes hold 8-10% fragrance. Consult your supplier for the exact amount you should use and only use scents recommended for candles. Do not use commercial perfumes, air fresheners, potpourri oils, or craft store scents made for soaps only. This is a fire safety issue. The easiest way to determine how much scent to use is to weigh the wax prior to melting it and then weigh the fragrance. I like to add the fragrance and color to the melted wax around 140-150 degrees F. I mostly use liquid candle dye. If you are using solid blocks, you can add the dye to the wax before melting. Adding scent to very hot wax will burn off some of the fragrance, resulting in a weaker scent for your candle.


STEP FIVE: POUR THE WAX
You can transfer the melted wax to a measuring cup or smaller pouring pot if it seems you are spilling too much. Fill the cup all the way to the top, without overflowing, with melted wax. You can pour 40-50 cups at a time before the wax starts to harden. After you have filled a few dozen cups, break from pouring to insert the wicks.


Freshly Poured Tea Lights With Wicks
STEP SIX: ADD THE WICKS
Since tea light cups are small, adding and centering the wick is easy. Simple add the straightened wick to the cup, center it, and move on. If your wicks flop over or slide around, they are most likely too long or your wax is too hot, causing the coated wicks to lose stability. Trim the wicks shorter and try again. If your problems persist, try a wick with a larger base (metal tab on bottom) next time

STEP SEVEN: LET THE CANDLES HARDEN
This will take about 2 hours for tea lights.

STEP EIGHT: TRIM WICKS AND CLEAN EXTERIOR
Using a scissors, trim the wicks to 1/4th inch and wipe and excess or spilled wax off the exterior of the candle with a clean rag.

You are now ready to test your candles! Tea lights should burn for 6-10 hours without the cup warping, melting, or spilling wax. If you get a candle that burns too fast, too smoky, or warps the cup, try a test batch with a smaller wick. Remember, soy wax needs one size bigger wick than paraffin wax.