Friday, January 27, 2012

Digital Scrapbooking: How To Get Started

Picture Made From Digital Scrapbook Clip Art
Love paper and making scrapbooks, but hate the potential to make mistakes that can't be undone or the inability to save your creation and print it multiple times? If you said yes, then digital scrapbooking might be for you. Basically, it combines the elements of making a normal scrapbook, but you design and share it digitally via social media or an online photo sharing site, like Flickr. You can also print your creations and make greeting cards, calendars, scrapbooks, and more. This article contains more information: http://www.twopeasinabucket.com/article.asp

Mama's Sweetheart
I just started digital scrapbooking and I made this layout featuring my cat, Pepper. I used Printmaster software and Gimp 2.

You can purchase many easy to use design programs that come with free templates and clip art. With Printmaster, you can go online and purchase additional papers, clip art, and fonts. It is also easy to find digital collage sheets for sale online to use in your designs. I purchased some on Etsy.com. Please note that most of these designs are copyrighted and the intent is to use the content to make your own digital work, not to resell the digital file or clip art in its original form.

So, now that you have completed your first design, what can you do with it?
-print it and frame it for decor
-share it on social media or online
-print it as an ACEO
-use it in jewelry design
-make desktop wallpapers for your computer
-print it on special papers to make t-shirts, mousepads, stickers, and more

The beauty of having your scrapbook as a digital file is that you can put it on a thumb drive or email it to your local printer and have her print it for you professionally to your sepcifications. My brother's inlaws even found a way to turn their digital scrapbook photos into a commerative quilt!


Ummm...He's Only A Little Spoiled

Thursday, January 26, 2012

SWAG= Sealed With A Gift: Should You Include Free Samples With Your Online Craft Sales?

Thanking Your Customers Is Important
So, you have made a sale of your handmade crafts online, congratulations! Of course, you want to continue to make sales, and that means striving for stellar customer service. The question of whether to include SWAG, or free gifts, with an order is one that your will have to carefully consider to determine the best choice for your business.

The term SWAG comes from the acronym SWAK, short for sealed with a kiss, and SWAG is very trendy these days, with entire websites devoted to free stuff and free samples and how to get them. Knowing that, please take into consideration that your online craft business will likely encounter request from people for samples or donations. Some may want a product to review for a blog; some may be charitable donations looking for a door prize. Make sure to check that these requests are legitimate. Visit the blogs and research the organizations, then decide if the donation is worth it to you in terms of potential exposure. Don't be afraid to say no and look out for scammers.

A Free Gift With Order (SWAG)
Now, for your regular customers, you want to go the extra mile to please, and that may involve including SWAG; however, keep in mind the following points:

-Make sure you are not losing money by sending expensive samples or gifts.

-Many people dislike waste and throwing things in the trash. Try to make sure your gifts are related to the customer's purchase and to what you sell.

-Don't overdo it with frilly or over-the-top packaging; your customers are likely to be eco-conscious.

-Think about what you can include that will entice the customer to return to you for future handmade purchases. That might mean a sample of your latest scent or a coupon for other goods you sell.

-Always include a written thank-you, if you have the time.

-Try not to use candy or edibles Many people have allergies or diseases, like diabetes.
Soap Samples of Newest Scents

-Make sure your gift cannot be construed as offensive to any group.
There is a soap forum I am part of, and a woman received a button with her order that said, "Got Homophobia?". Even though this is a condemnation of those that discriminate against gays, not everyone appreciates this type of sarcasm. Additionally, the button was not related to the items sold by the crafter online. While I personally find the message amusing, not all of my customers would, so I always try to keep politics out of my business. This would apply to religion as well. You don't personally know your customers, so be friendly, without assuming anything about an individual's world views.

-If you are including a consumable, such as soap, lotion, candy, or perfume, please include the ingredients and the name of your shop. You want people with allergies to know what is in the item and to be able to find you online if they enjoy the sample.

Earrings as a Free Gift
-Be wary of including scented products if you do not sell them. Again, people with allergies might dislike this. In my shop, in my message after the customer checks out, I inform them to please tell me if they would prefer not to get scented samples or if they do not want a free gift.

-Don't assume your customers are all female. Yes, women shop online frequently, but so do men. Things like jewelry as SWAG might not appeal to both genders. Take a look at the customer's name and what they bought to match that with an appropriate gift or sample.


When in doubt, or if lacking any appropriate ideas, you can always include a coupon code for a discount and a sincere thank-you note! Don't feel pressured to include elaborate gifts or SWAG if you can't afford it, or don't want to. Your best way to satisfy the customer is to deliver the merchandise in good condition, in a speedy fashion.

Finally, keep in mind that even though you try your best, you will never be able to satisfy every customer in every way. For each person that thinks a free gift is a monument to waste, there will be another person who thinks you should have made it bigger, or included more. The most important mission is to make your customer know you are thankful for the business, with or without the SWAG.

Please visit this link on the TEAMBORO Facebook page to see the layout of the THANK YOU tags featured in this article. I designed them and am happy to share if you would like to copy it and make some for yourself. They are printed on 80 lb cardstock, available at any office supply store. There is also a tutorial in the archives of this blog on how to make gift tags:
http://www.facebook.com/TennesseeCrafts#!/photo.php?fbid=226483307437311&set=a.130833410335635.34563.109313592487617&type=1&theater


Wednesday, January 25, 2012

Candle Burning Safety


Handmade Candles from Murfreesboro
Candles are always popular holiday gifts, and whether you recieved candles as a gift, or are making your own, this post is a reminder to be vigilant about fire safety when enjoying your candles.

When you first unwrap a new candle, you want to trim the wick to about 1/4 inch, or the size of a thumbnail. Long wicks can produce big flames that are dangerous.

Next, prepare an area for burning your candle. Make sure the area is out of reach of pets and children and away from curtains, upholstery, or any flammable decor. Try to choose a table or a counter that will not wobble or tip over by accident.


Candle in Tin Jar by Mylana
If you have a pillar candle, make sure to burn it on a plate. Quite often, they will burn unevenly, due to drafty rooms or a slightly off-center wick and cause one side to buldge. You don't want hot wax to get on your carpetm furniture, or skin- ouch!

Now, if you have a jar or a container candle, you want to inspect the exterior of the candle for any cracks in the glass. A major cause of injury from container candles is the glass overheating. This can cause sharp shards of glass to break away from the candle. Additionally, if a large volume of melted wax suddenly pours out of the candle, it will make the flame very high and hazardous. By checking the jar for visible cracks, you are helping to prevent a mishap. For candle makers, thick glass is best and more resistant to high heat. Be wary of large wicks overheating your glass and causing it to crack.


Soy Wax Candles
Other candles, such as votives and tapers, need to be in the proper contianers before burning. Always burn tea lights and votives in a snug holder. This helps the candle last longer and it is safer.

You are almost ready to light your candle, but beforehand, double check that you have time to spend in the same area your candle is- you DO NOT want to leave a burning candle, or tart warmer, unsupervised.

I like to use the long candle lighters, like this one, available at Walgreen's. They are great for preventing burns and reaching into jars. If you use matches, run the match under water before disposing of it in the trash.

Once you light your candle, there might be some smoke for the first few minutes, until a melt pool forms, providing steady fuel for the flame. If the candle produces lots of black smoke or soot, or the flame seems unreasonable large, extinguish the flame and do not burn the candle. Most likely, the wick is too big. (if this is a candle you made, try a smaller size wick).

Wood wick candles will sometimes crackle and sputter. This is natural and part of the charm. Make sure they are not sitting on anything flammable, like a fabric placemat, in case a small piece of wood escapes the candle.

If you are burning a candle with any decorative herbs, flowers, twigs, or dried fruit, keep a special eye out that the flame does not get too close to any objects in the candle that are not metal or glass. In general, for making candles, I stay away from using anything flammable, unless it is a double walled "forever" candle. Hurricane candles are made with a hard wax exterior for embedding objects and a softer wax in the center, allowing the candle to burn down while leaving the shell intact. These should only be attempted to be made by advanced chandlers.

Don't play in the wax pool of a burning candle! I know it is tempting, but you can get singed or burned easily. There are some massage candles marketed that you can use the melted wax as lotion. I have never used one of these and cannot comment, besides make sure to read and follow all the directions. Also, refrain from moving a lit candle, and if you have to, remember that metal and glass jars will be hot. You can use an oven mitt, if needed.

Try to burn your candle for 6 hours or less. When you are finished burning it, you can put out the flame with a candle snuffer (best) or blowing (more dangerous, use common sense). Once the flame is out, you can inspect the melt pool for any large, black wick fragments and remove them with a cotton swab, wooden craft stick, or bamboo skewer. Only do this when the candle is not lit. When you are ready to burn your candle again, trim the wick if necessary with a scissors and wipe away any black wick particles before lighting.

Have fun burning your candles and use common sense safety precautions! It is a good idea for households to have and emergency fire extinguisher for any household or kitchen fires. Finally, while safety is on your mind, make sure you have a working smoke alarm.

Monday, January 23, 2012

Let's Make Earring Cards!


Handmade Ancient Manuscript Earring Cards
Jewelry makers and paper artists, get set to gather your supplies and have handmade earring display cards made in a matter of minutes. All you need is a few basic supplies, and a nice pair of earrings to hang on your new card. Perfect for kids and adults, unique display cards add a touch of class to your creation or gift.

MATERIALS:
1/16 inch hole pucher
cardstock
ruler
scissors
rubber earring backs (donuts)
earrings to display


2 x 2 Inch Squares on Cardstock

STEP ONE:

TN Made Gift Tags from http://www.etsy.com/shop/BillisPaperBatiks
Print your design on cardstock or purchase some at a scrapbook store with a cute theme. I purchased the ancient text squares above from Etsy.com in the supplies section and printed it myself on blank cardstock. If your design does not come all ready diveded into blocks, business cards work well. I choose the 2 x 3 option and print them myself. You can even use gift tags, like these made by Billi's Paper Batiks, from Sevierville, TN. When I used this design here in the picture, I cut each gift tag in half, so that I had 2 earring cards from each one.

STEP 2:


1/16 Hole Pucher
Score and cut your paper. If you printed business cards or bought a design that is divided into rectangles, start cutting! If you purchased cardsstock with no lines, get out that ruler and score your paper before cutting. Some suggested sizes are 2 x 2 inches (50 x 50 mm) or 2 x 3 inches (50 x 75 mm). Lucky you if you happen to own a paper cutter!

STEP 3:
Use the 1/16th punch to make 2 evenly spaced holes at the top of the card.

STEP 4:
Insert the earrings into the holes and secure with the rubber earring donuts.


Card With Holes
Now you are done! If you chose the larger, business size cards for backing, you can fold the tops over to hang on a jewelry display shelf or wire. Look for the paper and hole puncher at any scrapbook store. Rubber donuts can be purchased at bead shops or Hobby Lobby. To alter the design for leverback earrings, simply use a regular hole punch to add a second hole 1/4 inch below the tiny ones. Thread the jewelry through both holes and secure the lever.

Rubber Donuts


Team Treasury Winner: We Go Together Like...

'we go together like...' by psalm27designs

peanut butter & jelly….bacon & eggs….milk & cookies….peas & carrots

Made for each other Val...
$26.00
kitchen art kids room c...
$18.00
Best Friends Charm Pill...
$15.00
Valentine Card - Peanut...
$4.25
Bacon and eggs necklace
$26.00
Love Card - Bacon and E...
$3.50
Twins Bacon Eggs Onesie...
$32.50
Bacon 'n Egg
$15.00
Milk and Cookies fine a...
$11.00
Kawaii Milk and Cookies...
$5.20
REDUCED Milk and Cookie...
$4.00
Milk and Cookies Happy ...
$25.00
Peas and Carrot Best Fr...
$27.00
Twin set- Long Sleeve P...
$21.99
Peas Love Carrots Singl...
$3.00
Peas and Carrots framed...
$15.00

Friday, January 20, 2012

Spotlight on Southpaw Art: Leatherworking

Today we are going to hear a little bit about Middle Tennessee artisan and owner of Southpaw Art about his creations and his treade, Leatherworking. You can browse his handmade wares here: http://www.etsy.com/shop/SouthPawArt

Hand Tooled Purse made in Hendersonville:
http://www.etsy.com/listing/70316219/western-tooled-leather-clutch-purse
"Hi, I am Draper and I live in Hendersonville, Tn about 20 minutes north of Nashville,Tn I run and few online shops under the name "SouthpawArt". I make and sell handmade leather goods and some chainmaille jewelry with a rocker or biker style to them, that doesn't mean I have left anyone out that might be looking for a western or simple flower designs, etc.
I started my leather craft style with a lot of western flowers and things. I didn't have many sales, so started doing more my style and my designs with skulls and flames and found that sale picked up a little. I plan on creating more designs based around this idea in the coming year.
Coin Purse made by Southpaw Art

I was introduced to leather work by a neighbor who has been doing it for twenty plus years but has mostly stopped do to his age as his eyes sight is not what it used to be and arthritis is bad in his hands. So he hasn't been able to show me a lot always but he has good advice on different parts of the craft. Some of what I have learned about leather work has come from the internet and reading and studying different peoples work. There are a few websites out there that can help you along the way one of the best is leatherworker.net it has a good forum for asking questions and pointing you in the right direction.

Close up of detailed skull on Wallet:
http://www.etsy.com/listing/75021285/custom-carved-skull-flames-leather
It is always tough to give new carvers honest feedback most don't understand that it takes a lot of practice to get good. You can also take a few starter classes at Tandy Leather in Nashville and get a feel as to is this craft or art for you. But the bulk of your learning must be hands on, through doing it and making mistakes. The only way to learn the feel of the knife and the wetness of the leather is to do it and that is only one step in the process. The art or craft of leather work can take many years to learn and a life time to master. It is a craft that has many different areas of learning for different people.

Original Flames Design by Southpaw Art
Most of my focus over the last few years has been on the art of tooling leather sometimes called carving. The first part of carving or tooling a design in to leather starts with a design or a pattern. Once you have decided on a design be it a yours or one from the past or even a craftaid. Typical you will lay a piece of tracing film over the printed outline drawing and take a marker and trace the outline. This is will be used to transfer the design to the wet leather and the base for your cutting. Once the cutting is done you will take different tools and a rawhide mallet and add patterns and textures to the leather, giving the leather a raised and lowered look. This is a very simplified version of what happens, then the work begins, changing it in to a finished product so you can see there must be a plan even before the carving begins.

Most of my designs are geared toward men but i'm always looking and open for ideas that might work for those bad girls out there. I try to keep designs in my shop for both but you can always email me and ask about having something custom made for you or a friend. I also don't mind helping out others starting in the art of leatherworking."

Thank you very much for your time, Draper! We look forward to seeing what new items you are creating. Here is a link to Tandy Leather, located in Nashville- this looks like a great local business to buy supplies from: http://www.tandyleatherfactory.com/en-usd/home/home.aspx

Thursday, January 19, 2012

Tips To Beat The Mid-Winter Blues For Craft Sellers


Brightly Colored Handmade Earrings
Whether you make pillows or swimsuits, magnets or mousepads, artisans of all types usually face a post-holiday slowdown. What do you do when you lose momentum and craft show season is far-off? If you sell online, how can you increase your views and sales when everything seems so dead? This article aims to provide you with a few tips to get thorough the slow season and prepare for an even bigger year in 2012!

If you are just starting your craft business, you might be asking yourself, what holiday rush? Perhaps you haven't been around long enough to establish a pattern of sesonal sales. Nevertheless, these tips can also help you in the initial phase of your craft business, as you struggle to keep motivation and invest your time in activities that will be of long-term benefit.

1) Get noticed for Valentine's Day. This holiday is about 3 weeks away, which is plenty of time to put together a quick project with a love theme, or promote an appropriate gift item of yours. Blog about things you are creating for the holiday or post pictures on facebook. If you sell on Etsy, you can make gift guides and treasuries with hearts or Valentine's colors. Put your red, pink, and heart items up as your featured creations. Act before the end of January for maximum impact, because, as you know, retailers will all ready be setting out the shamrocks and St. Patty's day items in February. Speaking of that, it wouldn't hurt to have a standout green item to promote for that holiday as well.

2) Wondering how to promote your shop and creations with Facebook and Twitter? The best thing you can do when using social media, such as Twitter, is to avoid bombarding the public with your new listings and sales. People are so conditioned to tune out advertising, that the more commercial your posts and tweets are, the more likely they are to be ignored. Try and post pictures of items you are making and your creative process. Show people how much work and pride is behind each piece. Tell an inspiring story that prompted you to make a certian thing. Get your audience excited about your work. Tweet about other artists you admire and community events.

3) How do you promote and get attention elsewhere besides using social media? What are the best ways to get noticed for free?
-start a blog
-comment on blogs
-participate in Etsy teams or forums
-donate an item to a local fundraiser
-submit your items to sites like Etsy Lush and look for handmade blogs looking for shops to feature
-be active in an internet commuity where you can put your shop name in your signature

handmade love plaque frm Tennessee Heritage
 http://www.etsy.com/listing/90887895/tumbled-marble-plaque-home-decor-3x6
One word of caution about promoting is to be wary about blogs seeking free products for giveaways or promotions. Check the blog for how many followers there are and how many participants they usually get for giveaways. Sometimes you will find an offer that will provide you with great exposure; othertimes you will find blogs with few followers or scammers looking for free productw. Don't be afraid to ask questions before donating an item for a giveaway!

Snowflake Soap
4) Think spring (and Summer, and Fall, and Christmas...)! Prepare a list of crafts you can make to increase seasonal traffic and sales. For example on Etsy, my shop, Mylana, has a snowflake soap which made it onto 100 treasuries so far this winter. While I have only sold 2, it has brought many views into my shop. I am thinking ahead to what products I can promote for the different seasons and holidays. I try to change my item tags to get holiday traffic, 6-8 weeks before the actual holiday or season change. You will find that in the coming weeks, spring colors, flowers, and April showers will be popular trends for treasuries and for items to be featured in blogs.

5) Produce, produce, produce! Use the slow times to stock up on your best sellers and items you predict will be popular. That way, you can sell one and have another to list. Time is your most valuable asset and if you find yourself with extra minutes on hand when it is slow, you will recieve your payback during the busy season. If you find you accumulate too much inventory, you can always look for a local craft show to sign up for or a boutique that accepts consignment.

6) Tweak your packaging or presentation. This is a great time to make a new Etsy banner or build a display for local craft shows. Make gift tags and invest in getting your shipping supplies replenished. Design new labels for your products and ways to make them stand out and look professional at fairs or online.

7) It's a new year, so get your financial and legal business organized. You don't want to sign up for a craft fair and find out too late that you are required to have a certain permit or a tax form. The best place to start getting the information is from state and local websites and officials. Every community and county has different regulations about licenses and permits, and some states don't have a sales tax to deal with. It might seem intimidating, but if you seem overwhelmed, pick up the phone and call your local or state officials. Don't be afraid to ask questions; it's their job to help you!

8) Replenish your materials. Are you running low on supplies after a busy holiday? Many companies have great sales to attract consumers during the slower times of the year. So, make a list of your supplies you need for your crafts and keep it handy in case you see a sale at a fabric or craft store. Even online vendors have sales and discounts at times. This is a great time of year to look for bargains.

9) Speaking of sales, have a winter sale of your own. Create a promotional code if you sell on etsy for a percent discount, or offer free shipping for a limited time. If you have wares for sale locally, consider accepting a lower price for some things in exchange to move inventory. You might want to investigate submitting an application to Heartsy, which is like a groupon for Etsy, if you have a great amount of inventory and really need the exposure. Be prepared to offer 50% off or more to be featured on Heartsy. Myself, I prefer to make a coupon code and offer it to my facebook users or include it with orders to attract repeat customers.

10) Redo your photos. Capturing your items for online sales and editing them takes a lot of work. Enjoy the slower pace of business to dedicate time to photographing your creations. You might want to look for someone to barter with to get professional photos taken of your crafts or to hire a graphic designer to make a shop logo or banner for you.

11) Make lists of tasks you need to do and goals you want to achieve in 2021. Even if you don't get them all done, it will help you maintain focus and it feels good to cross things off. Keep lists of inspiration you have for new items or ideas you want to try out.

Tuesday, January 10, 2012

How To Make Castile Soap From Scratch

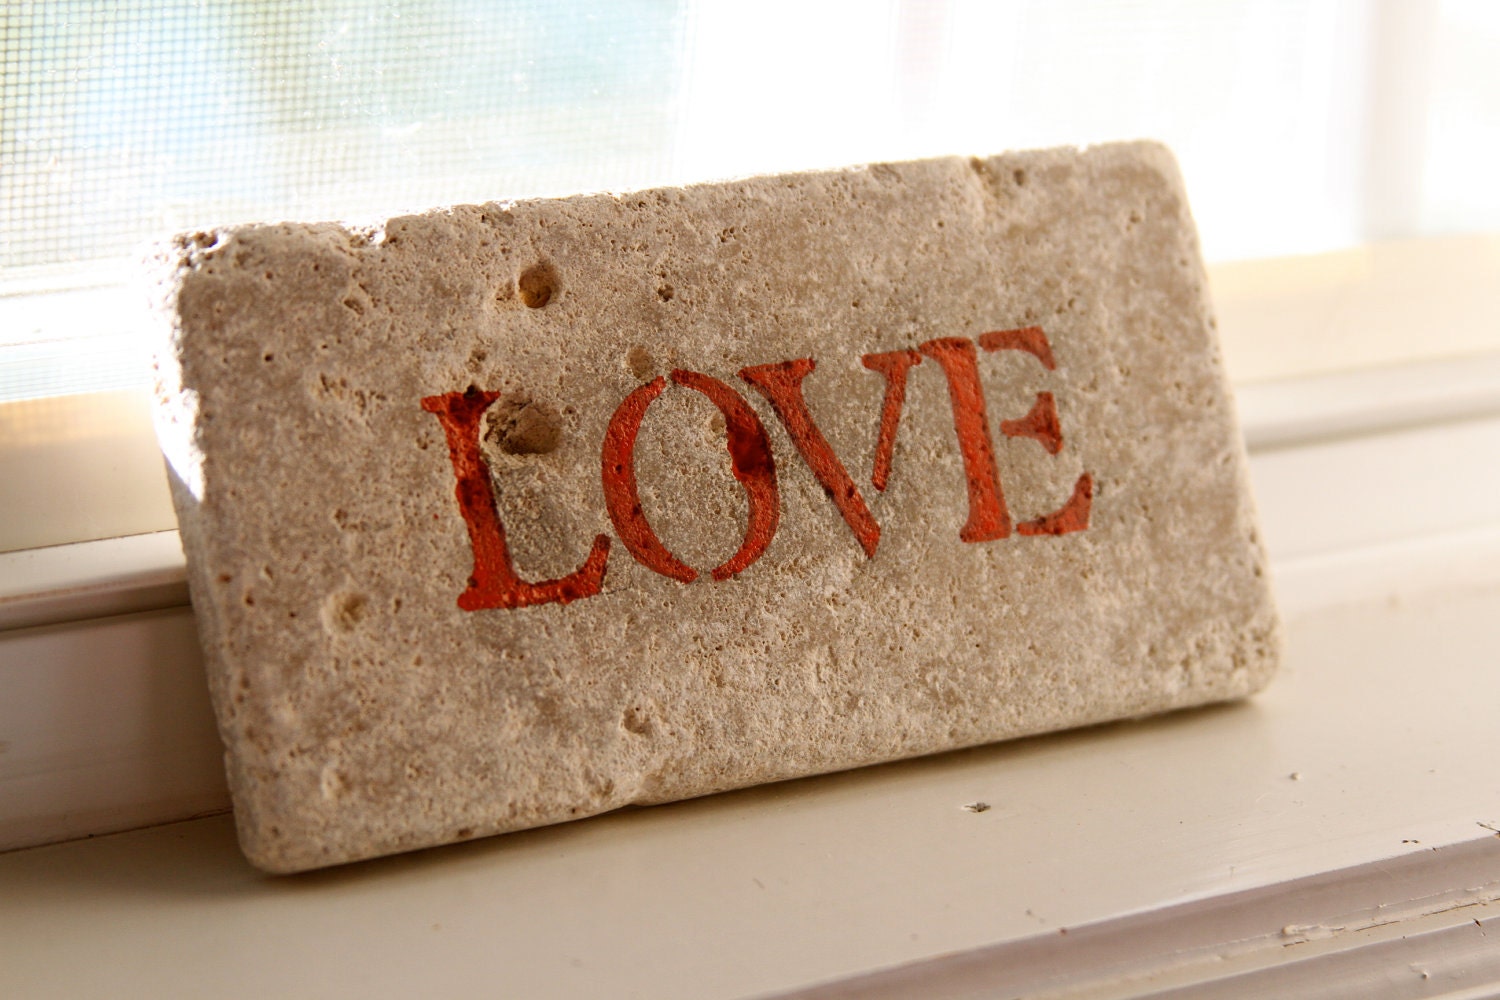
The Finished Soap From Article Before Trimming
In this post, I am going to walk you through making Castile soap. This is a 100% olive oil soap, traditionally produced in Spain. Many people make this recipe as an introduction to soap making. With one oil, it doesn't get any simpler than this; however, there is one major issue to overcome, and that is the adulteration of olive oil. Because of rising costs, many unscrupulous manufacterers are diluting olive oil with other less expensive oils. All oils have different saponification values, which is the amount of sodium hydroxide needed to turn that oil into soap, and olive oil that has been adulterated will not have the same saponification value as in a recipie. Your best bet is to only order olive oil from a reputable supplier that specializes in soapmaking supplies.

Difficulty: Beginner level soapmaking, should have a basic understanding of math, chemistry, kitchen equipment, and lab safety

Supplies: 100% pure olive oil (does not have to be extra virgin, just unadulterated), Sodium Hydroxide (NaOH), water, soap mold, stick blender, scale, containers for measuring, safety gear

Safety Precautions: Wear gloves and goggles along with long sleeves and closed toe shoes, use an accurate scale and double check measurements, always pour LYE into WATER (you can stop adding it if it looks like the reaction is happening too fast), NO pets or children in the room while measuring and mixing

Suppliers: You can get digital scales at Staples or wherever postage scales are sold, pure lye or NaOH can be purchased at some hardware stores but I prefer to order online from Essential Wholesale, 100% pure olive oil can be purchased from major soapmaking suppliers. The grade of the oil is unimportant; only that it is 100% olive. Pomace is popular for soapmaking. If you are purchasing your olive oil locally, Kirkland Organic has an excellent track record for purity, along with other domestically produced olive oils.

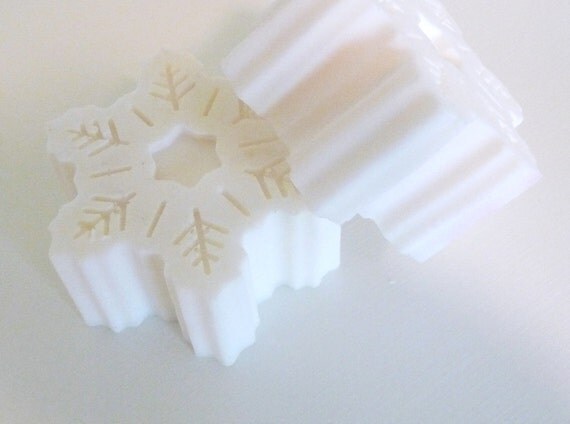
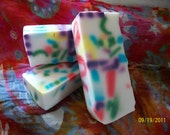
Handmade Soaps With Olive Oil
Before we get started, let's have a brief explaination of the soapmaking process. Basically, we are going to add Sodium Hydroxide to our oil which will cause a chemical reaction called saponificaion. This process causes changes in the oil molecule allowing it to act as an emulsifier, which is a substance that allows the mixing of oil and water based matter. So, when we get the final product, soap, we add water and lather it up on the skin, allowing oils and dirt to be emulsified with the water and easily rinsed off, leaving clean skin. If you are more interested in the actual chemistry of soap, there is a lot of information available by searching for saponification. I even had a chapter about it in my college organic chemistry class!

Now, let's go through the steps to turn our materials into finished soap and then I will show the pictures. I am doing all the mixing in my kitchen sink to avoid a mess.

1) Obtain a recipe. This can either be one from a website, book, or one that you make yourself using an online lye calculator. That is how I obtained my recipe, I weighed out the olive oil and used the Brambleberry lye calculator to show me how much lye and water I should add to saponify the oil. My recipe was 15.6 oz of oil, 1.98 oz of lye, and 5.1 oz of water. You can access the lye calculator here and purchase most of your supplies: http://www.brambleberry.com/Pages/Lye-Calculator.aspx

Choose a superfat level of 4-6% if making your own recipe; this is additional oil added beyond what is needed to make the soap to insure all the lye is reacted and you do not have a harsh, lye heavy soap.

2) Arrange your workspace. You might want to cover the counters with newspaper or plastic. Make sure you have all your materials laid out and handy. I use separate plastic containers to measure oil, water, and lye. If you have a mold that needs lining, do this ahead of time.

3) Put on saftey gear.

4) Measure ingredient using the scale.

5) Add the lye to the water and mix thouroughly. It may bubble up and you might sense heat rising from it. You may use a thermometer to measure the temperature of the lye/water; however, many soapmakers wait an hour or so until it cools to room temperature. If you use a thermometer, try and wait until the solution is under 100 degrees F to proceed. Advanced soapmakers sometimes prepare the lye/water ahead of time or mix it outdoors to speed cooling.

6) Add the lye/water to your oil. You need to pour slowly to avoid spills and splatters.

7) Use a stickblender to mix to light trace. You will see the mixture turn thick and opaque, leaving behind a distinct trail as you stir it. This will take about one minute, maybe less, of blending with a modern stick/immersion blender.

8) Pour into mold. This tutorial is not using colorants or fragrances; if you would like them, make sure to order skin safe additives from a well-known supplier.

9) Wait 12 to 24 hours until the soap is nice and firm. Remove it from the mold and cut it. You should be wearing gloves. Allow the soap to cure in a non-humid area, out of direct sunlight for 4-6 weeks. Many people prefer olive oil soap that is cured longer. Your soap may have a light coating of white "ash" on top. That may be trimmed off.

OK, now here are some pictures of me making the soap. Notice the greenish tint to the pure oil. The most important things to remember when you try making soap is buying the correct and pure materials, accurate measuring, and wearing your safety gear!


Olive Oil, NaOH, Silicone Mold

Measuring Ingredients

Adding LYE to WATER (not reverse)

Oil Before Adding the Lye Solution

Just After Adding the Lye Solution

Blended For About 45 Seconds

Poured In Mold