
Hot process soap is usually a little more rustic and less polished that cold process soaps; however, with hot process, you can use the soap a lot sooner and use fragrances that might cause problems using the cold process method.
If you have never made soap before, you will have to invest in the basic equipment, including safety gear.
-goggles, gloves, apron
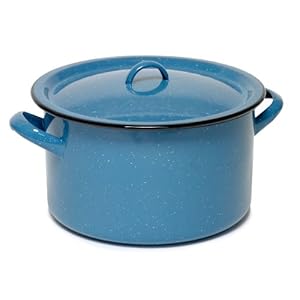
-large stockpot to use for soap only
-accurate food scale that weighs in both grams and ounces
-sodium hydroxide (lye)
-stick blender or whisk and wooden spoons
-measuring cups
-fixed oils such as olive, coconut, lard and many more
-colorants, either natural or synthetic
-fragrance, either natural or synthetic
-molds, you may use lined boxes or plastic food storage containers
You will also need a good basic soap recipe and about 2 hours of time. This link has a good beginner level recipe; however, there are many easy recipes available with a simple Google search:
http://www.eaudrey.com/basic2.htm

STEP ONE: Prepare your work area. Gather all of your materials and safety gear, along with potholders, rags, and other kitchen basics and check that your oven can accommodate a large pot. Set the oven to 175 F.


STEP 4: Slowly pour the oils into the pot with the lye/water mixture. Make sure you are still wearing your safety gear in case or spills or splashes, then stir the mixture with a whisk, or use a stick blender until you get an opaque, uniform, creamy mixture with no separation of oil and water. You should be able to see a faint line in the mixture from your stirring implement. This is called "trace".

STEP 5: Place your pot, without the lid, into the oven. Make sure that you have a few inches of space available for the mixture to "grow". You will now be checking the mixture every 10-15 minutes; it may be wise to set a timer.
STEP 6: Prepare your molds, fragrance, and colorants while the soap is cooking. You will also have plenty of time to wash any measuring cups or utensils that you have dirtied.


You should now have your molds prepared, colorants ready, and fragrance weighed out. If you are unsure how much colorant or fragrance to use, consult your recipe or the supplier's recommendations. Typically, 1 oz of fragrance per 1 pound of base oils will make a very strong scented soap. You may want to start with less if you are sensitive to fragrance, or if you are using an expensive essential oil. Powdered colorants should be dispersed in vegetable glycerin before adding to the soap. I mix mine in disposable bathroom cups. You will not need very much, as they are highly concentrated.
STEP 7: Check your soap in the oven every 10-15 minutes, even if it is just to open the door and peek to make sure it is not climbing over the edge of the pot. If you see it expanding close to overflow, simply stir the mixture back down. You may use this time while the soap is "cooking" to prepare any additional colorants and additives, like oatmeal, and continue cleaning your dirty equipment and putting the fixed oils and lye away.

Soon your soap will form big, distinct lumps and it might get transparent in places. This is called the "vaseline stage". The soap is getting hot enough to go through gel, where they lye and oils are reacting and generating heat.
 This picture is at the 45 minute mark. The soap is now more opaque and slightly lumpy, but not thick. We want to cook the soap until it reaches a very high viscosity, like mashed potatoes. If you can easily stir the mixture, it is not ready.
This is the one hour and 15 minutes mark. It is getting thicker and lumpy, but there are still some watery parts.

Here is the soap at the one hour and 30 minutes mark, it is very thick and almost ready. This is where you will remove it from the oven and stir the mixture, until it is more creamy and less lumpy. Then add your fragrance and additives and continue stirring with the pot removed from the oven for 2-3 minutes. This will be too thick to stick blend, you will need to stir by hand.
If you want to make sure your soap is fully cooked, you can do this simple test, Dip in a spoon and get a small amount of soap. Let the soap cool until you can touch it gently with a bare finger. You should not get any sting or burning sensation. Then touch just the tip of your tongue to the soap, if you get a zap, or small electric shock, the soap is not done. If you notice a burning sensation on your skin or a zap, put the soap back in the oven for 15 more minutes and test again. If the soap continues to zap or burn, you have made a soap with too much lye and it will need to be discarded. You can save the batch by making laundry soap or rebatching with additional oil; however, that is beyond the scope of the beginner level.
Try to incorporate your fragrance and additives completely, before "glopping" the soap into your mold, otherwise you may have pockets of fragrance oil leaking from your soap.
At this stage, the soap is still in the pot and uncolored, if you want to do layers, or swirls, you will need to work quickly with the colors, as the soap will set up very quickly as it cools. This series of pictures shows pouring the soap into the molds in layers with different colors and then the final cut soap. See how lumpy and rustic the finished bars are? They will need to be trimmed up and left in a cool, dry, dark place for storage. They may be soft for a few days, depending on how much water and fragrance was in the recipe.
Can you notice in the first picture the oily layer on the soap to the left? That is excess fragrance oil that did not fully incorporate into the soap. I took a spoon and stirred the oil into my soap more, while in the mold; however, I ended up with a softer bottom layer on that loaf. It will need to be trimmed off or left for a long time to harden, perhaps a few weeks or more.


When finished spooning the soap into the molds, try to press the surface down or gently lift the mold and bang it on the counter, to help air pockets escape.
As long as your soap is not lye heavy, the soap can usually be saved if it doesn't turn out right, either by letting it cure and dry for an extended period, trimming off the offending portion, or grating it like cheese and adding it to another batch.
You may test your soap as soon as it is firm and cool, but keep in mind that the longer it cures, the harder the bar will become. I advise to let the soap cure 4 weeks before sharing it.
 For troubleshooting, the most common problem will be soft soap, as many soapers add a few extra ounces of water, so that the soap will be easier to stir and get into the mold. It could also result from a portion of the batch where the fragrance was not fully stirred in. If the soap is still soft after 3 or 4 weeks, you will need to research "rebatching" the soap in order to save it.
 This soap will need to be sliced, trimmed, and polished. I use a vegetable peeler for small areas and edges and a dry terrycloth rag for polishing unsightly regions.
Enjoy your soaps! This tutorial and pictures provided by Clare Corcoran of Murfreesboro, TN and proprietor of Mylana http://www.etsy.com/shop/Mylana

Questionable color scheme in some of the soaps :)
ReplyDelete